How do I add 301 (Permanent) Web forwarding?
This article will explain how you can add a 301 (Permanent) Web forwarding to your domain name.
You can use permanent Web forwarding to inform search engines that your domain name will be permanently pointing at the new location. However, you can change your permanent web forwarding settings later on if you need to.
Before you get started, you’ll first need to make sure your domain is pointed to the 123 Reg nameservers. Otherwise, any configurations you’ve made to the DNS through our Control Panel will not take effect. You will need to set your DNS at your nameserver provider. For more information on how to do this, please view the following article: How do I change the nameservers for my domain name?
Please note: it will take between 24-48 hours for any nameserver changes to become active.
Once you’ve done this, simply follow these instructions:
Start by logging in to your 123 Reg Control Panel.
Next, select Manage All opposite Domains within the ‘All Products and Services’ section.
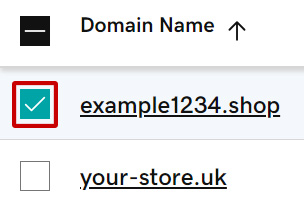
You will now see a complete list of your purchased domain names. Select which one you wish to update from the provided list by clicking the checkbox next to it.
If you can’t find your domain in this list, you may be able to find it on the Domain Name Overview page within our legacy Control Panel. For more details on this, please read the following article: How do I access and manage my products?
If you’re using our current Control Panel, click Forward in the bar that appears below. If you can’t see this option, click More instead and you will find it within the menu that appears.
If you’re using our legacy Control Panel, select Web forwarding within the Domain Basics section.
If you’re using our current Control Panel, a pop-up window will appear where you will see several forwarding options. Select Permanent (301).
If you’re using our legacy Control Panel, you’ll be taken to a new page instead, which will show a list of your domains. Select Edit for the domain you wish to add a forwarder to and then click the Permanent forwarding (301 redirect) tab.
Next, enter the link or URL you want visitors to be directed to within the provided field and click Continue or Confirm.
After a few moments, your 301 forwarder will be set up.
You won’t need to do anything else as we will automatically update your domain’s DNS records to incorporate our default forwarding IP address: 94.136.40.82