Email Forwarding explained
This article will explain what email forwarding is and how you can set it up through your 123 Reg Control Panel.
Simply select a question from the list below to find out more information:
- What is email forwarding?
- What is the difference between an email forwarder and a mailbox?
- How do I set up an email forwarder?
- How do I edit email forwarding?
- How do I delete an email forwarder?
- What is catch-all email forwarding and how do I set one up?
What is email forwarding?
Email forwarding allows you to automatically direct messages to an alternative email address. For example, if you have a long or unremarkable personal address like ‘johnsmith-enterprises@hotmail.co.uk’, you could set up the forwarding address ‘contact@johnsmith-enterprises.co.uk’ (which you would share with customers and promote on your website) to deliver emails to your personal address.
You can create a maximum of 50 email forwarders in total per account. Each email forwarder can then forward to a maximum of 10 recipients.
What is the difference between an email forwarder and a mailbox?
An email forwarder can only be used to direct mail to an existing account. Additionally, you cannot send messages from a forwarding address.
With a mailbox however, you can send and receive emails. They also have built-in spam and anti-virus protection, plus you can easily set it up on third-party email clients such as Outlook, Apple Mail and Gmail. Alternatively, you can access your emails on-the-go from any device through Webmail.
If, however, you’ve purchased a Microsoft 365 package, you can store copies of forwarded messages within your forwarder’s inbox. That way, your messages can be viewed from both the forwarding address and the mailbox it will be passing messages on to.
If you enable auto forwarding, all messages sent to your email address will be forwarded to another address. To do this, simply follow the instructions outlined in the following guide: Configuring your webmail.
How do I set up an email forwarder?
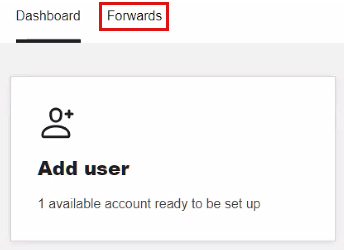
- Start by accessing your Email Dashboard
- Select the heading Forwards.
- On the next page, click Add Forward.
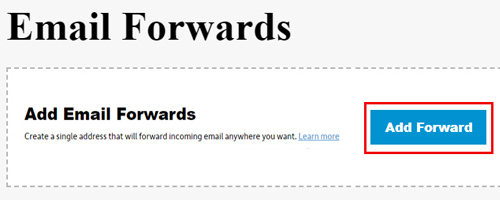
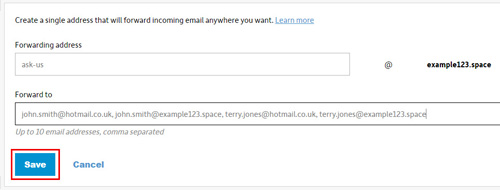
- Enter a forwarding address into the provided field. Make sure this is an original name because you won’t be able to create a forwarding address for existing mailboxes.
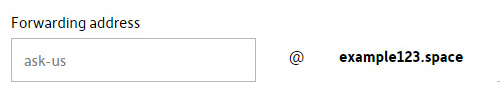
Next, enter the email address(es) you want to forward to into the provided field. Be sure to use commas to separate each one.
Once you’ve done this, click Save to continue.
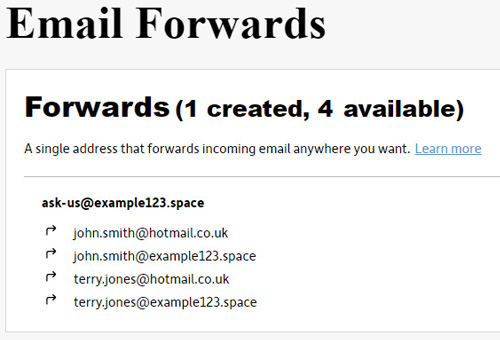
- You will now see your new email forwarding address on the Email Forwards page, along with the associated email addresses.
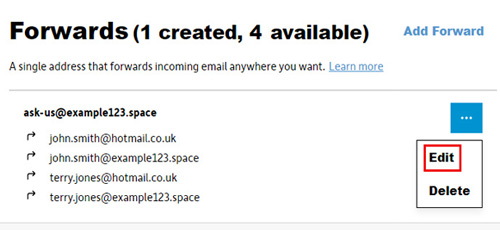
How do I edit email forwarding?
- Start by accessing your Email Dashboard.
- Select the heading Forwards.
- On the next page, find the forwarding address you wish to edit and select the three-dot icon that appears opposite it. From there, click Edit from the menu that appears.
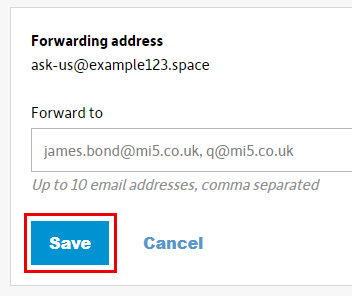
You’ll now be able to edit the email addresses associated with your forwarding address. Be sure to use commas to separate each one.
Once you’re finished, click Save to confirm your changes.
How do I delete an email forwarder?
- Start by accessing your Email Dashboard.
- Select the heading Forwards.
- On the next page, find the forwarding address you wish to edit and select the three-dot icon that appears opposite it. From there, click Delete from the menu that appears.
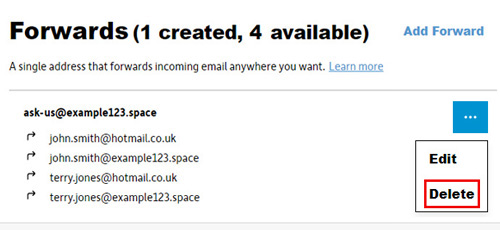
- Next, you will need to confirm your decision by clicking Delete.

- Your email forwarder will now be removed from the Forwards page.
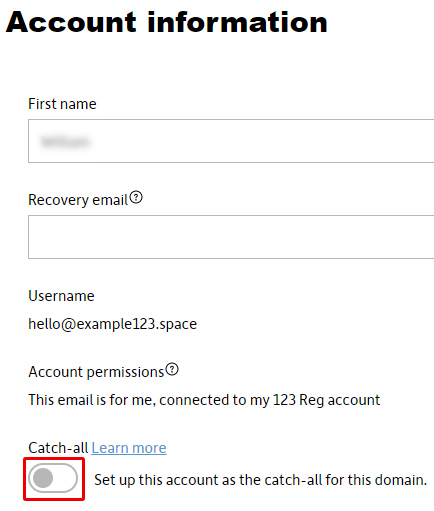
What is catch-all email forwarding and how do I set it up?
Catch-all email forwarding gives you the ability to forward all emails sent to your domain on to an email address of your choice. You can create a catch-all mailbox on your mailbox by following the steps outlined below:
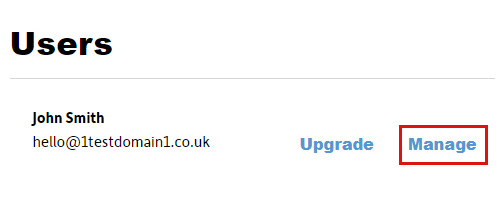
- Start by accessing your Email Dashboard.
- From there, select Manage for the mailbox you want to enable catch-all forwarding for.
- Scroll down the page and Edit within Account information.
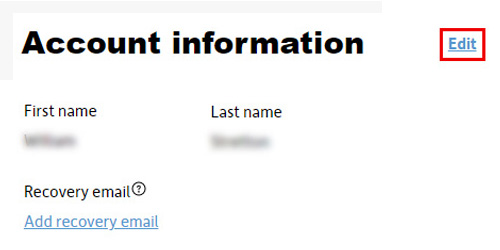
- Select the toggle below Catch-all to enable your account as the catch-all for your domain.