Purchasing and configuring your 123 Reg Mailbox

This article will show you how to purchase and configure your 123 Reg mailbox.

Simply click on a title below to skip to the most appropriate FAQ. You can also click the Top button to return and make another selection.

How do I purchase an email address/mailbox?

Purchasing a mailbox will allow you to create an email address associated with your domain name so, instead of having ‘yourname@hotmail.com’, you can have ‘yourname@yourdomain.com’. Not only does this give you more control over your email address, but it will also give your brand a more professional look.

Our mailboxes work on a quota system. Instead of buying a mailbox as a separate entity, you purchase a mailbox quota, which can either be set as a mailbox or an email forwarder. This allows you complete flexibility over your email set up.

For example, if you purchase 5 mailboxes and find that you want to change one of the email addresses you’ve set up, you can simply delete the first mailbox and use that quota to create another one, instead of creating a completely new one. The article below will show you how to purchase a mailbox, allowing you to create your new email address.

Please note: You can also purchase additional mailboxes directly from the 123 Reg website.

Step 1 of 5

Start by logging in to your 123 Reg Control Panel.


Step 2 of 5

From there, select Email within the ‘Manage active products’ section and then choose Manage opposite Manage your email.

Select Manage email


Step 3 of 5

On the next page, click Buy more.

Click Buy more


Step 4 of 5

You’ll now be taken to the Email Hosting page where you can choose your preferred plan by selecting the relevant Buy button.

Buy mailbox


Step 5 of 5

Your mailbox will now be added to your basket. Simply follow the on-screen steps to complete your purchase.

Complete checkout

Once done, you can then create your mailbox by following the instructions in this Support article: How do I create a mailbox?


How do I change or edit my mailbox address?

The only way to change your mailbox address is by deleting the old mailbox and then creating a new one in its place. This can be done by following the steps outlined in the next section below.

How do I delete a mailbox?

For Generation 2 mailboxes

Please note: you have up to 14 days after the deletion date to restore your mailbox.

Step 1 of 4

Start by accessing your Email Dashboard.


Step 2 of 4

From there, select Manage opposite the account you wish to delete.

Select Manage


Step 3 of 4

On the next page, click Delete account.
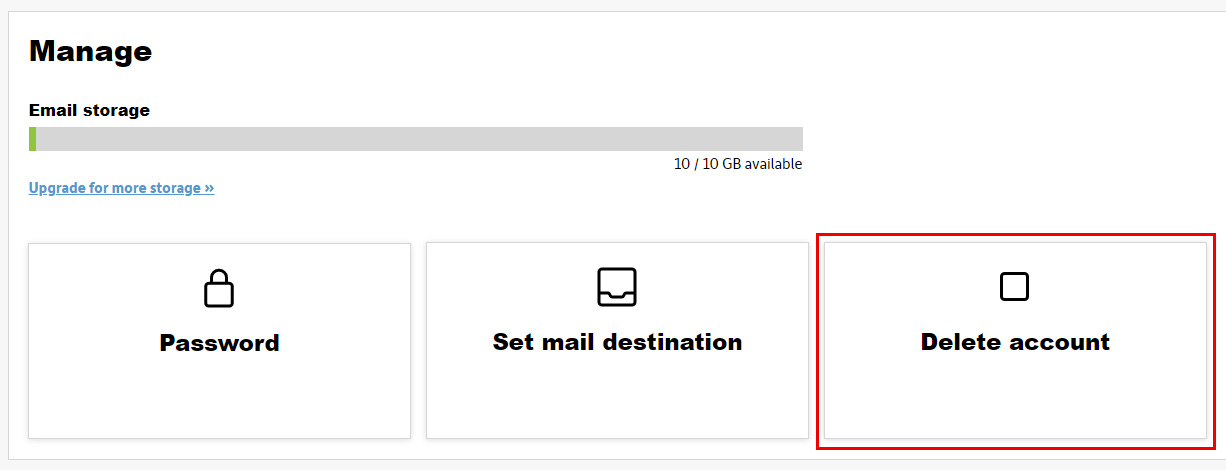
Click Delete account


Step 4 of 4

You will now need to confirm the deletion by selecting the provided tickbox and then clicking Delete.
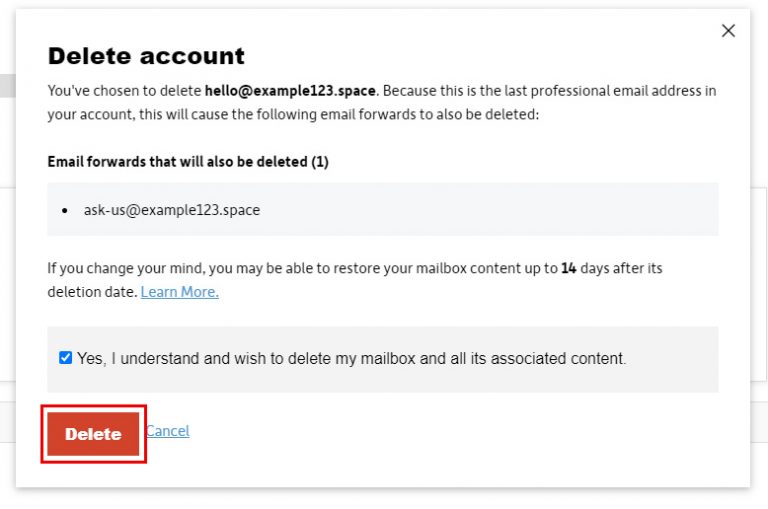
Click Delete


For Generation 1 mailboxes

Please note: deletion is an irreversible action and will cause you to lose all of the emails and other data associated with the mailbox.

As such, please make sure that you have retrieved anything you need by backing up your emails before deleting your mailbox.

Step 1 of 4

Start by logging in to your 123 Reg Control Panel.


Step 2 of 4

From there, select Email within the ‘Manage active products’ section and then click Manage opposite Manage your email.

Manage Gen 1 Email


Step 3 of 4

On the next page, select Options for the mailbox you wish to remove and select Delete Address from the drop-down menu that appears.

Select Delete Address

You can also delete multiple addresses by selecting the tick boxes for the mailboxes you wish to delete. From there, click the ‘Delete selected’ box above.

Delete multiple addresses


Step 4 of 4

In both cases, a pop-up window will appear asking if you wish to delete your selected mailbox(es). Click Save & Exit to confirm this.

Delete Address


How do I upgrade a mailbox?

For Generation 2 mailboxes

Step 1 of 5

Start by logging in to your 123 Reg Control Panel.


Step 2 of 5

From there, select Email within the ‘Manage active products’ section and then click Manage opposite Manage your email.

Manage Gen 2 Email


Step 3 of 5

On the next page, select Options for the mailbox you wish to upgrade and choose Upgrade from the list of options.

Select Upgrade


Step 4 of 5

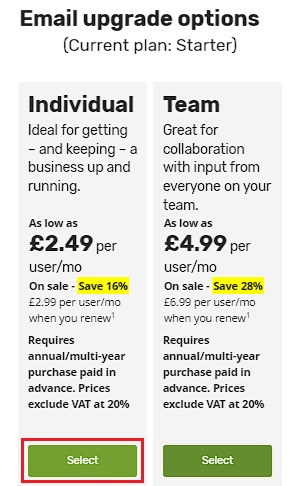
You will now be taken to the Upgrade page. From here, choose which plan you want to upgrade your mailbox to by selecting its respective Upgrade button.

Choose plan


Step 5 of 5

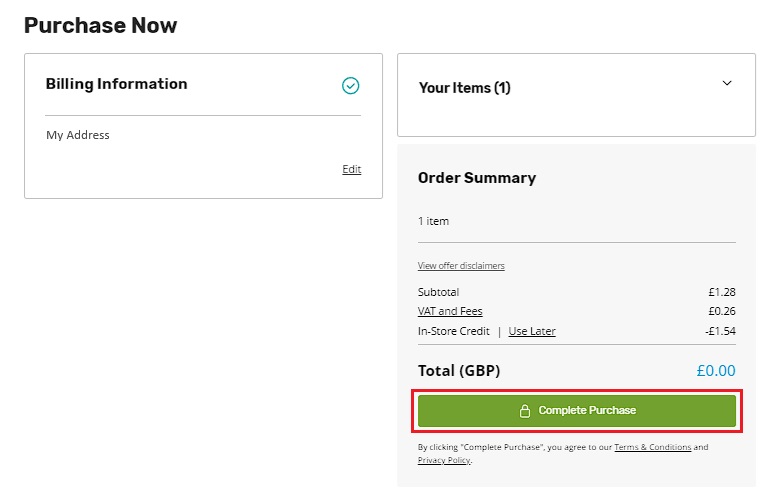
You will now be taken to the checkout page. Follow the on-screen instructions to upgrade your plan.

Complete checkout


For Generation 1 mailboxes

Please note: in order to upgrade an existing mailbox, you will first need to purchase the higher tier that you wish to upgrade your mailbox to. If you’ve already done this, skip to Step 4.

Step 1 of 6

Start by visiting our Email Hosting page and browse the plans we have available. Once you’ve decided upon a plan, click Buy.

Buy mailbox


Step 2 of 6

Follow the on-screen instructions to complete the checkout.

Complete checkout


Step 3 of 6

Next, log in to your 123 Reg Control Panel.


Step 4 of 6

From there, select Email within the Manage Active Products section and then choose Manage Email.

Manage Gen 1 Email


Step 5 of 6

On the next page, select the Options tab for the mailbox you wish to upgrade and select Manage Type from the drop-down menu that appears.

Select Manage Type


Step 6 of 6

A pop-up window will now appear, asking you to select which plan you wish to upgrade your mailbox to.

Simply select your preferred plan and click Upgrade to complete the process.

Upgrade mailbox


How do I change my mailbox password?

If you have forgotten or want to update the password for your mailbox, you can set a new one by following the steps outlined below:

Please note: if you have set up your mailbox in a third-party email client such as Outlook, you will need to update its settings within these clients to incorporate your new password.

For Generation 2 mailboxes

Step 1 of 4

Start by accessing your Email Dashboard.


Step 2 of 4

From there, select Manage opposite the account you wish to update the password for.

Select Manage


Step 3 of 4

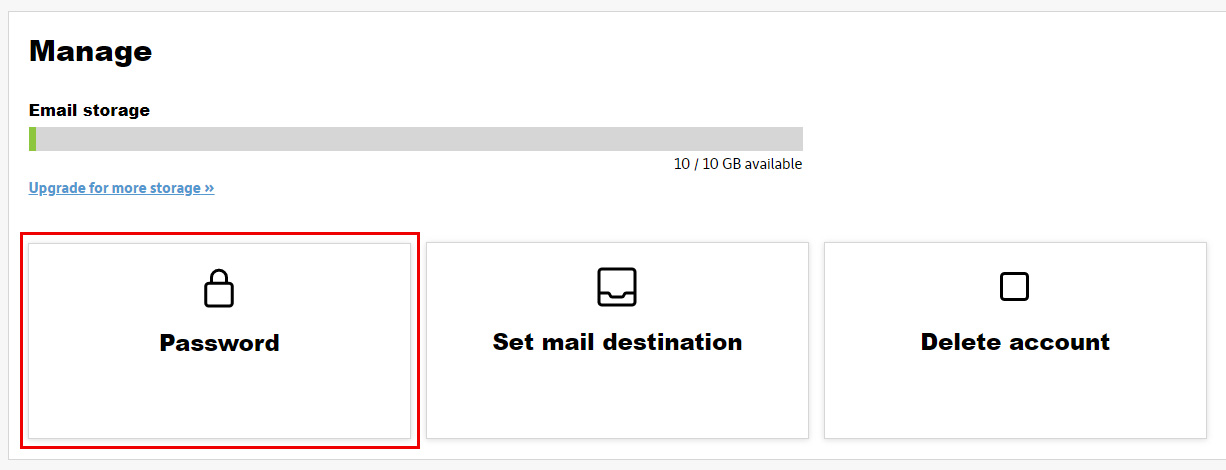
On the next page, click Password.

Click Password


Step 4 of 4

You will now need to enter a new password, along with a recovery email address, into the provided fields. Alternatively, you can generate a temporary password.

Once done, click Save to confirm your change.
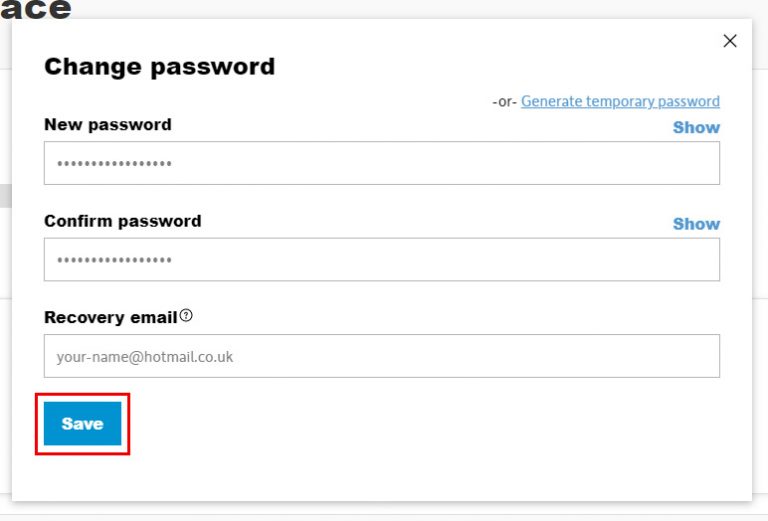
Enter new password


For Generation 1 mailboxes

Step 1 of 5

Start by logging in to your 123 Reg Control Panel.


Step 2 of 5

From there, select Email within the ‘Manage active products’ section and then click Manage opposite Manage your email.

Manage Gen 1 Email


Step 3 of 5

Select the Options tab for the mailbox you need the password for and choose Mailbox Settings from the drop-down menu that appears.

Choose Mailbox Settings


Step 4 of 5

On the next page, click Edit opposite Password.

Edit Password


Step 5 of 5

A pop-up window will now appear where you can enter a new password. This must meet the following criteria in order for it to be accepted:

  • Mixed case: use a combination of uppercase and lowercase characters
  • Numbers: use a mixture of numbers and letters
  • Special characters: use at least one of the following special characters : ” ! $ % ^ & * ( ) -_ = + } { # @ ‘ : ; . > , < / | ?
  • Length: must be at least eight characters long
  • Unique Characters: must contain at least four unique characters and no more than two of the same character in a row (e.g. ‘hhh’ is not allowed)
  • Number Sequences: must not contain more than two numerical characters in sequence (e.g. 123 is not allowed)

Once done, click Save & Exit to confirm your changes.

Update password


How do I edit the spam filter on my mailbox/email forwarding?

Please note: the following steps only apply to Generation 1 mailboxes.

Our Generation 2 mailboxes use a modern, built-in filtering system that adapts and learns from previous emails that you have marked as spam.

Step 1 of 5

Start by logging in to your 123 Reg Control Panel.


Step 2 of 5

From there, select Email within the ‘Manage active products’ section and then click Manage opposite Manage your email.

Manage Gen 1 Email


Step 3 of 5

Select the Options tab for the mailbox you wish to amend and choose Mailbox Settings from the drop-down menu that appears.

Choose Mailbox Settings


Step 4 of 5

Under Summary, click Change opposite Spam filtering.

Change Spam filtering


Step 5 of 5

On the next page, use the slide tool to set the levels for Spam Flagging and Spam Deletion.

o is the strongest setting and 10 is the weakest setting. If you set your spam delete level filter to 0, this will turn on the spam filter and delete any emails that are detected as spam. If you would like spam to come through, you should set your spam delete filter and flagging level to 10.

Once done, click Save changes to complete the process.

Set spam filter levels